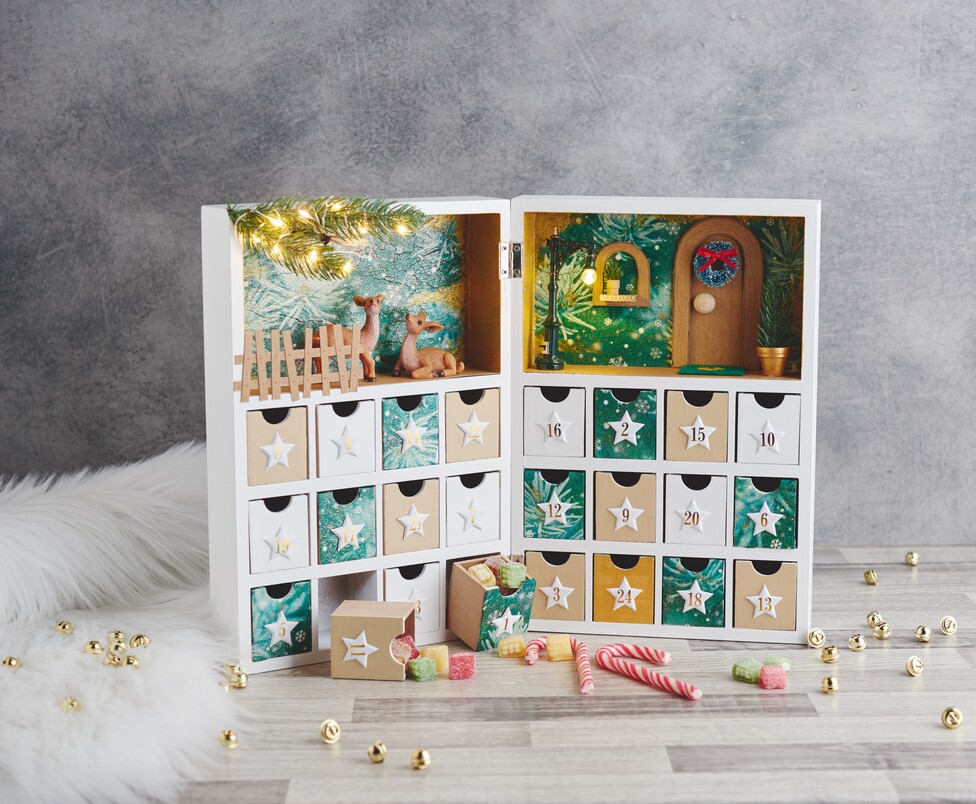
This is how you design the Advent calendar:
The back panels and 8 drawer fronts were designed using the napkin technique and glitter napkin varnish. To do this, first cut the napkin as desired and remove the unprinted layers of the napkin. For the napkin technique, you only need the printed layer. Coat the back wall or the drawer with the napkin varnish and place the napkin on the coated area. Coat the motifs again with varnish and leave to dry.
We painted eight more drawers with craft paint in beige and one drawer in gold for Christmas, 24 December.
Once dry, stick the number stickers on all the drawers.
The side panels and the top of the upper compartments were painted with Stardust. Two coats were applied for better coverage. If you like, you can dab some Stardust into the napkin motif for a nice effect.
Download the templates for the door and window and transfer them to kraft paper. Cut them out and add wood grain using a fineliner. You can also cut kraft paper for the bottoms of the compartments and use the fineliners to imitate wood grain.
Stick the door frame onto the door using 3D adhesive pads, add a wooden hemisphere as a knob and stick on the miniature wreath as a door wreath. Then glue the door into the wintry scene. Fold the windowsill and roll a small "flower pot" from strips of kraft paper and glue it together. Cut a piece of the fir branch, stick it in and glue it to the windowsill. Glue the window into the scene with 3D pads.
Paint the terracotta pot gold with craft paint, glue a branch of the fir tree inside and place it next to the door.
We cut a small doormat from the felt and painted a heart on it with Stardust.
Place the lantern and fix it with some double-sided tape.
Glue together a fence from some thin strips of kraft paper and add details with the fineliners.
Wrap the fairy lights around some fir and attach to the cabinet with hot glue. The battery compartment and the remaining cable can be hidden behind the branch.
Now you can glue the deer into the scene and a great winter landscape with a beautiful Advent calendar is ready.