When the days get shorter, rustic decorations bring a cozy atmosphere into the home. What could be better than a beautiful wooden disc? They look particularly charming when decorated with little owls made from polymer clay - a perfect match for the season and with a unique character. Be inspired by our detailed DIY-Instructions and create your own personal fall decoration!
Let's go: Make the basic shapes out of polymer clay
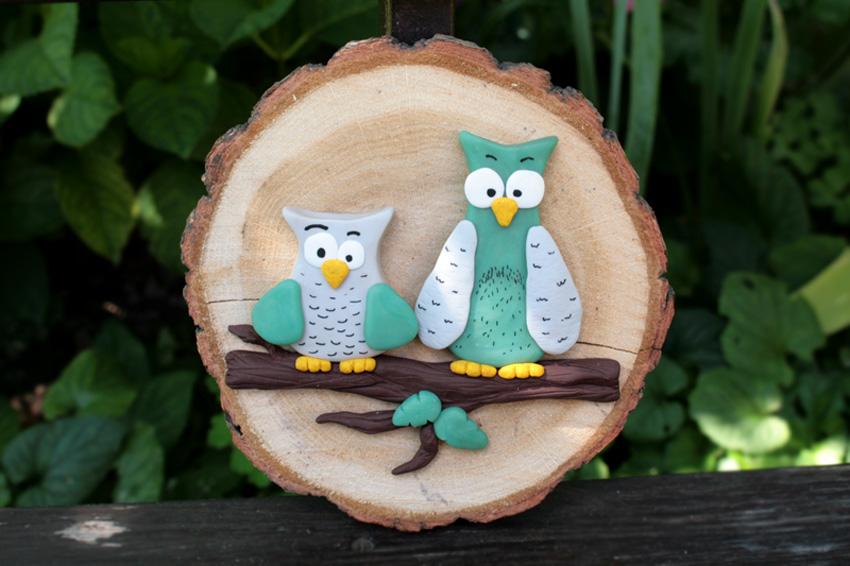
To make the work easier, draw the outline of your wooden disk on a piece of baking paper. This way, you know the maximum size of your decoration and you can put the owls directly into the oven with the baking paper without damaging them when you lift them up. Shape a thick branch out of brown polymer clay according to the outline. Give it structure with toothpicks or your fingernails to enhance the natural look.

Depending on the color you want, take some polymer clay and form a ball. Form a rough neck above the half. Two "horns" are then formed from the upper part. Press the owl slightly flatter and place it along the branch. Repeat this step by trying out different sizes and shapes.

Add details
For the eyes, shape balls out of white polymer clay and press them flat. Place them on the owl's head and shape them. For the wings, divide a larger polymer clay ball into two equal parts using a knife. Shape them into two balls and then the wings. Attach them to the sides of the owl's body and add feather structures.

Before the owls go into the oven at 100°C top/bottom heat for about 25 minutes, you can add more details. Create beaks and feet from gold polymer clay and decorate the branch with small twigs and leaves if you wish.

Final: Shaping the wooden disk
Once the owls have cooled, apply the handicraft glue to the back and attach the owls to the wooden disk. Use the Posca marker, to paint on the final details. Optionally, you can drill a hole in the upper area to hang the wooden disk with hemp cord or a similar ribbon .

Have fun making your own!