Basic instruction screen printing
Instructions No. 1802
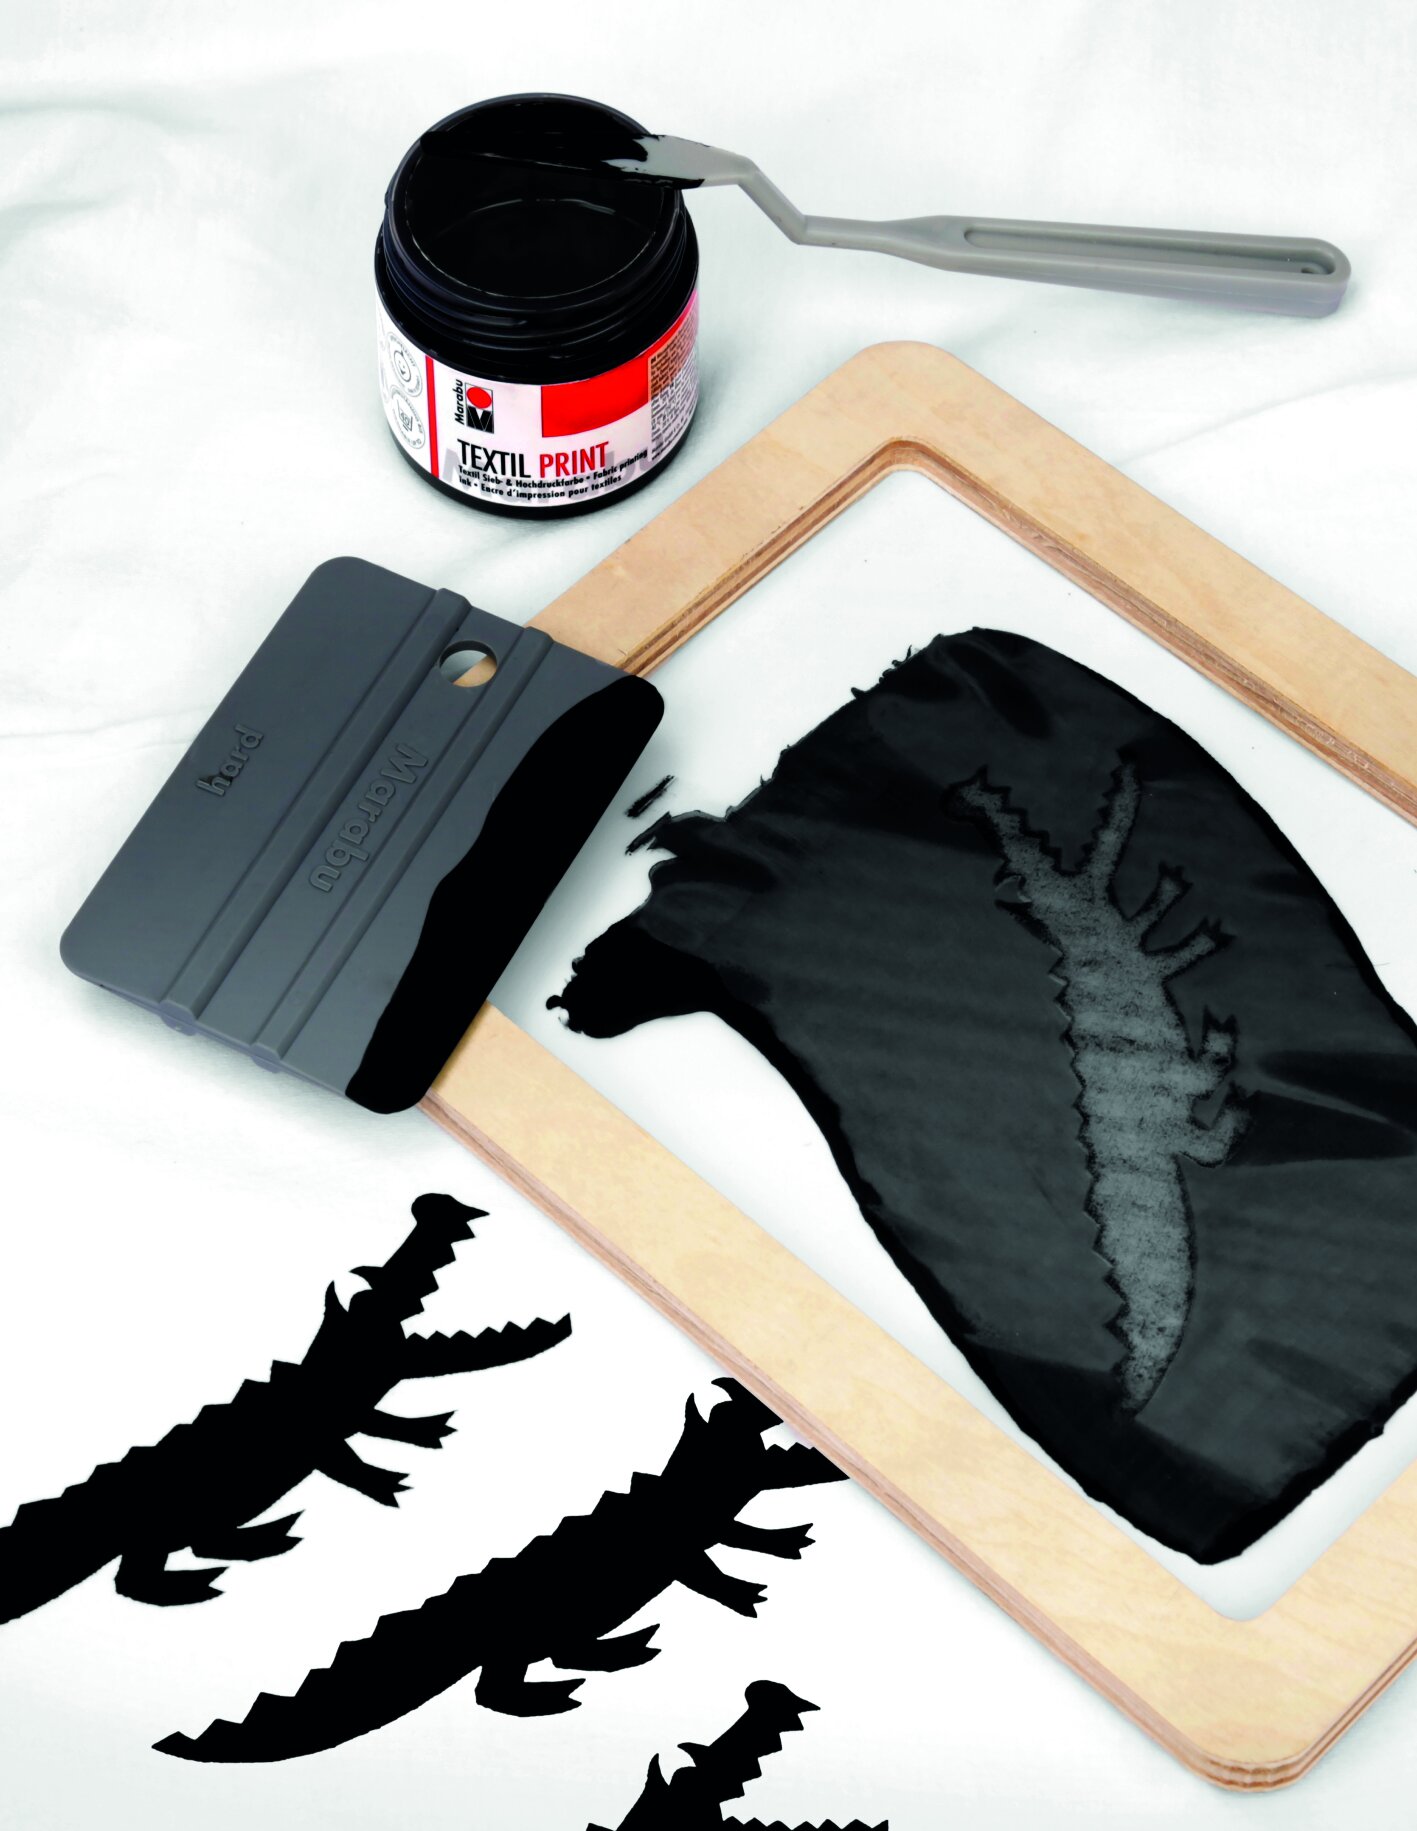
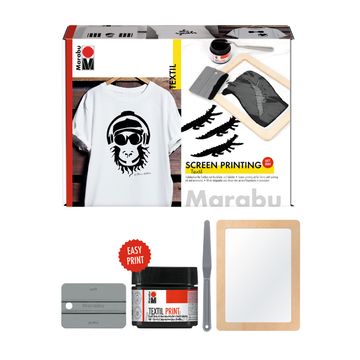
Silkscreen is a great technique to print t-shirts, fabrics and cloth
With this technique it is even possible to print in series. Here, ink is printed through a tightly woven fabric using a squeegee. The areas that should remain unprinted are covered. For this technique only any one of the following is required Cutter, a screen, Adhesive tape, a Scraper and the printing ink in the desired colour shades.
Before you start
Before you start painting, you should cover your work surface properly to avoid contamination. Place a cardboard or foil between the layers of fabric to prevent paint from penetrating. Always stir your paint well before use. Your textiles should be free of finishes and fabric softeners
Step-by-step to success:
- Think of a motif for your project. Then transfer this to your stencil material. This can be either Paper, cardboard or thicker foil.
- There are two possibilities for the development of the positive Stencil: and the negative stencil. With the positive stencil, you cut out the lines and shapes, i.e. these areas will later become coloured and the background remains in the basic colour of your fabric. To illustrate this with an example: If you cut a circle in a DIN Paper, A4, you would use the sheet with the cut circle for a positive stencil. With a negative stencil the lines and shapes of the motif remain and the other areas are cut out. In our example this means that you would glue the cut out circle on the screen.
- Glue the finished one Stencil to the flat side of the screen. Use Adhesive tape this to help prevent your design from slipping.
- Now place the screen on the desired spot of your textile. Please make sure that yours Stencil lies directly on the fabric. Fonts should now be legible and not mirror-inverted.
- Now apply the printing ink to the upper screen border.
- Now use a squeegee to pull the ink from top to bottom over your motif. Use only light pressure for this. Repeat this process until the ink has been applied to all desired areas.
- Now carefully remove the screen from your material. When your printing process is finished, please clean the screen and the stencil Scraper immediately with water.
- If you want to use more than one colour, cover the areas that are not to be printed or are already printed. Proceed as described above with each colour application. With each pass clean the Scraper.
- After drying, fix your textile piece according to the package information of your printing ink. Afterwards your textile is wash resistant up to 40 degrees.
- Clean your tools immediately after use.
- Please iron and wash your finished textile piece/fabric inside out.