- Secure order
- Easy return shipment
- Service-Hotline 03 69 61 69 10
Instructions No. 4012
Difficulty: Beginner
Working time: 2 Hours


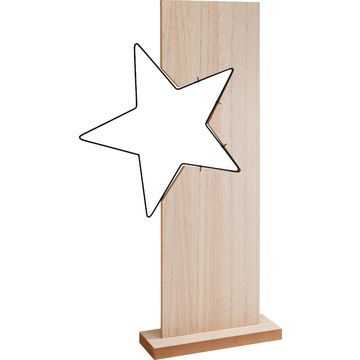
1. Remove and prepare the metal star. First, remove the metal star from the wood so you can illuminate it properly later. To do this, untwist the small wires holding the star in place and carefully remove them. This keeps the wooden cutout intact, and you’ll be able to reinsert the star exactly where it belonged later.
2. Wrap the “ chain of light ” around the star Take a thin “ chain of light ” and wrap it crisscross around the metal star. This irregular wrapping creates a dense, sparkling light pattern and fills the star shape evenly. Make sure the wire fits snugly so nothing slips out of place later.
3. Transfer the design template Print out the Christmas template and place it on the wooden sign. Use graphite paper to transfer the lines onto the wood. The goal is to create clear outlines for the wooden burning so you don’t have to sketch freehand. Secure the Paper if necessary to prevent it from shifting.
4. Heat up the pyrography station and burn in the lines Plug in the pyrography station and give the pyrography pen time to get really hot. Pyrography wooden burning involves using a heated tip to burn lines into the surface of the wood. Slowly trace along the pre-drawn lines. This ensures the edges darken evenly. For fine details, use light pressure and short strokes so the wood doesn’t darken too much.
chain of light 5. Reinsert the star into the cutout Place the board in front of you with the back side facing up. Insert the metal star into the cutout in the wood. From the back, you can check whether it lies flat and the pyrography remains cleanly within the star. This step is important to ensure that the lighting sits securely later and the front looks neat.
6. Secure the metal star. Use the side cutters to cut short pieces of the wrapping wire. Thread the wire pieces through the holes in the wood and feed them through the metal star. Twist the ends together and bend them over. This mechanically secures the star without smearing glue on the wooden burning or the wood surface.
7. Neatly hide the battery box For the battery box of the “ chain of light ,” screw a screw hooks into the wood. You can hang the box from it so it doesn’t sit on the table, allowing you to place the decoration flexibly. Make sure the cable is taut and doesn’t pull on the star.
8. Secure the wooden sign to the base and decorate it for Christmas Secure the sign to the base with a bit of hot glue. The hot glue sets quickly and holds firmly, which is especially handy if you want to rearrange the Christmas decoration later. Next, glue a few fir sprigs and pinecones to the base to make the scene look more natural. Place fir figures and an angel next to it to complete the arrangement as a harmonious, illuminated christmas decoration .
Now it’s your turn: Browse the online shop for suitable templates, “ chains of lights ,” and decorative materials, and turn your illuminated “ wooden burning-” wooden sign into a festive centerpiece.