- Secure order
- Easy return shipment
- Service-Hotline 03 69 61 69 10
Instructions No. 4086
Difficulty: Beginner
Working time: 2 Hours


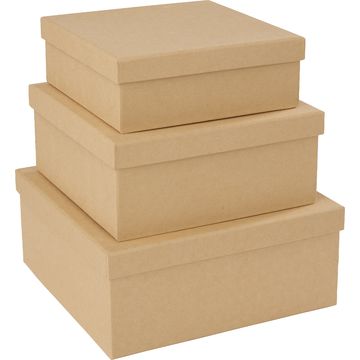
Decorate cardboard boxes with a Christmas theme using linoleum print . First, choose the size you’d like to give as a gift from the square box set. Also, have a sheet of scrap paper ready—this will help you test your print before printing on the boxes.
1. Prepare the design and think in mirror image Draw a simple Christmas design in pencil on vellum paper, —for example, stars, fir trees, or small accents that can be easily repeated. For the linoleum print , keep in mind: Everything will end up mirrored. This doesn’t matter for stars, but for text or clearly recognizable shapes, it’s worth printing the design mirrored in advance or drawing it mirrored from the start.
2. Transfer the design to the linoleum printing plate Place the vellum paper with the drawing facing down on the linoleum printing plate. Smooth it evenly with the flat of your hand or a scoring tool. This transfers the pencil lines to the plate, and you’ll see exactly where to cut later. This step ensures that your stamp design turns out clean.
3. Carving the linoleum: What’s cut away stays white Take the carving knife and cut away everything that shouldn’t be visible later. The rule of thumb for linoleum carving is: The areas that remain will print; the areas that are cut away will remain blank. Work slowly and make several small cuts rather than applying a lot of pressure. This ensures clean edges, and your design will appear crisp on the cardboard box later.
4. Apply ink and make a test print: Put some “ handicraft paint ” ink on a plate and pick it up with the ink roller. Roll back and forth until the ink is evenly distributed on the roller. Then roll evenly over the “ linoleum printing plate, ” without pressing too hard—a thin, opaque layer usually produces the best results. Now make a test print on scrap paper. This way, you’ll immediately see if any areas need to be trimmed or if too much ink was applied.
5. Print on the boxes and create a pattern Once the test print looks right, print your design as desired on the lids and bases of the cardboard boxes. Add individual stars as small highlights or create a loose, scattered pattern that looks harmonious all around. For more depth, you can work with different shades and stamp the designs slightly offset. Let each printed area dry briefly so nothing smudges as you continue working.
6. Wrap with care: Ribbon and fir branch To finish, tie a ribbon around each box. Tuck a fir branch under the bow—this adds a natural touch to your Christmas wrapping and instantly transforms the square boxes into high-quality gift boxes.
7. Tip for a cohesive set: Design the three sizes as a matching series—one motif, but with different arrangements. For example, use a few large stars on the smallest box, a scattered pattern on the medium-sized one, and a combination of large and small elements on the largest box. This way, your “Giving with Love” set will look like it was designed as a single collection and is perfect for multiple gifts.
Now it’s your turn! Print your own personalized Christmas pattern and turn plain cardboard boxes into unique “ gift wrappings ” boxes at linoleum print. You’ll find matching colors, linoleum accessories, ribbon, and decorations in the online shop—so you can put together a set that perfectly matches your style.