Decorate the conical lampshade with straw silk paper and beads.
Place the lampshade in front of you so that you can roll it easily, and smooth out the straw silk paper on a clean surface.straw silk paper is a thin, slightly transparent natural paper with a fine fiber structure—ideal if you want to give your lampshade a warm, soft lighting effect.
1. Mark the straw silk paper for a precise fit.
Place the lampshade on the straw silk paper. and carefully roll it once over the surface so you can transfer the entire outline. Mark the outline with a pencil, leaving a small overhang all around. This overlap is important so you can fold the edge inward later—this gives the finish a clean, professional look.
2. Cut out with a clean edge
Cut out the straw silk paper along your markings. Work slowly and carefully to ensure the edge is as even as possible. If you need to make a minor adjustment in one spot, now is the best time to do it—any uneven edges will be more noticeable after you’ve applied the adhesive.
3. Applying the lampshade : Use napkin varnish as Adhesive and Sealer
Apply a thin coat of napkin varnish to the lampshade.
Napkin varnish is a special craft varnish that acts as both an adhesive and a protective sealant once dry.
Place the cut-to-size straw silk paper in position and smooth it out from the center outward to ensure no wrinkles or air bubbles remain. Then apply another thin layer of napkin varnish over the straw silk paper . This ensures everything bonds evenly, and the surface becomes more stable.Let the lampshade dry thoroughly—patience ensures a smooth, durable result.
4. Fold the excess material inward for a clean finish.
Once everything is dry, fold the excess material along the top and bottom edges inward. This hides the cut edges, and your DIY lampshade will look neatly finished even up close. Press the edge firmly all the way around so it doesn’t come loose later.
5. Prepare the bead garlands.
Thread wax beads of various sizes onto Perlon thread.
Perlon is a transparent, sturdy thread—perfect if you want the beads to appear to “float.”
Carefully knot the ends so nothing slips. Lay out several strands so you can distribute the decoration evenly across the conical lampshade.
6. Attaching Beads to the lampshade
Apply a small dot of hot glue to the top edge of the lampshade and secure the first pearl of a strand. Hot glue sets quickly, so work strand by strand and take your time positioning everything.
Align the bead lines so they fall harmoniously and the lampshade looks balanced all around. If you like, you can leave individual strands a little longer to achieve a lively, elegant look.
7. Finishing and Styling Tip:
Finally, check all the glued areas and press them down again if necessary. Let the hot glue cool completely before placing the lampshade on the lamp.
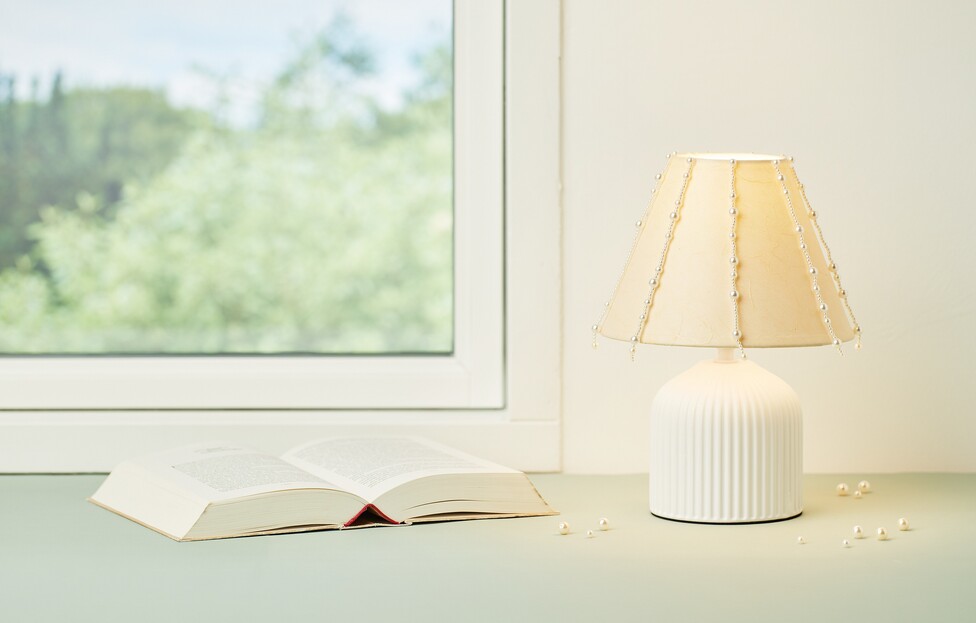
The straw silk paper provides a soft, warm light, and the wax beads add subtle accents to the lamp’s design—ideal as a homemade decoration for the living room, bedroom, or a cozy reading nook.
Now it’s your turn:
If you’re looking for more ideas on how to make a “ lampshade ” or need the right materials— straw silk paper-, techniques, beads, and glue—stop by our online shop and put together your next lamp project.