- Secure order
- Easy return shipment
- Service-Hotline 03 69 61 69 10
Instructions No. 4075
Difficulty: Beginner
Working time: 2 Hours


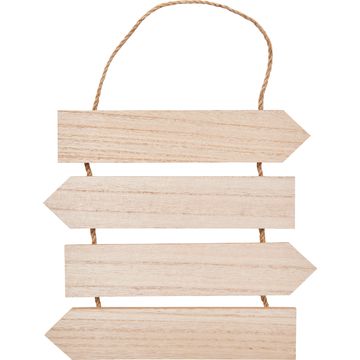
Paint a directional sign with a winter theme and turn it into a ladder decoration. Gather the hanging sign with the four directional arrows and a small wooden ladder, and protect your work surface. This will keep everything clean later when you’re painting and gluing, and you can work step by step at your own pace.
1. Prime the wood—for even, opaque coverage. Prime the sign with handicraft paint. A primer ensures that the wood “absorbs” less paint and that your “Winter Romance” color scheme (delicate, light tones and soft accents) appears uniform. Let the paint layer dry completely so nothing smudges as you continue working.
2. Secure the “ stencil ” – for crisp lettering Lightly spray the back of your “ stencil ” with spray adhesive and place it on the first directional arrow. Spray adhesive is a removable adhesive that holds the “ stencil ” in place temporarily. This prevents paint from running under the edges and ensures the lettering is clearly legible later on.
3. Dab on the lettering – metallic-Accents for winter Carefully dab the lettering with a metallic-acrylic paint through the stencil. Dabbing instead of painting is important here: This allows you to apply the paint in a controlled manner and achieve sharp edges. Carefully peel off the stencil immediately afterward, while the paint is still wet. Clean the stencil with clear water so that no paint residue dries on it and the next lettering turns out just as clean.
4. Label the remaining arrows—repeat the processstep by step Once the first lettering has dried, repeat the process on the other directional arrows with your desired text. Don’t move on to the next arrow until the paint on the previous one is dry. This keeps everything neat and prevents fingerprints or smudges on the metallic surfaces.
5. Apply snowflakes-scatter decoration – Winter decor with texture Once all the paint is dry, use handicraft glue to attach the snowflakes-scatter decoration to the sign. Place them strategically as small accents at the arrowheads or around the lettering. The idea behind this: The snowflakes add texture to the design and turn the painted sign into a genuine winter-themed wooden home decoration.
6. Optional: Sealing for outdoor use— clear varnish as a protective layer If you’d like to use the decoration outdoors, spray the sign and ladder with clear varnish. The varnish protects the painted surface from moisture and makes it more durable. Let the sealant air out thoroughly and dry completely before continuing with the decoration.
7. Decorating the Ladder – Attaching the Vine Garland and “ chain of light ” Cut a piece of the vine garland and wrap it around the ladder along with a string of delicate outdoor string lights. Secure both in place with small dots of hot glue. Hot glue sets instantly and is ideal for securing wire-like or irregular materials, such as vines, that would otherwise come loose.
8. Hang the sign and add details – a cohesive “Winter Romance” look Hang the sign on the ladder. Then glue a few “ christmas balls ” and additional “ scatter decoration ” to the ladder as accents. Make sure the decorations don’t cover the lettering and that the chain of light gently illuminates the elements—this gives the winter decoration a harmonious and high-quality look.
9. Finishing Touches—A Quick Check, Then Enjoy Once everything is securely in place, set the ladder decoration in a sheltered spot in your living area or—with clear varnish —even in a covered outdoor area. If you’re looking for more ideas on painting, stenciling , and wintery wooden decorations, you’ll find the right paints, stencils, scatter decoration , and chains of lights for your next project in our online shop.