- Secure order
- Easy return shipment
- Service-Hotline 03 69 61 69 10
Instructions No. 3524
Difficulty: Beginner
Working time: 30 Minutes

Preparing the base plate
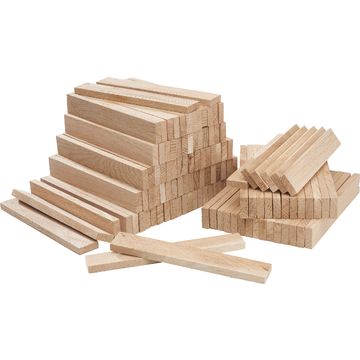
Start your project by taking four craft blocks and gluing them together on the long narrow sides to form a rectangular base plate. Make sure to apply the glue evenly to create a stable base. Allow the base plate to dry completely before moving on to the next step. Patience is important here to ensure a solid base.
Creating the holder
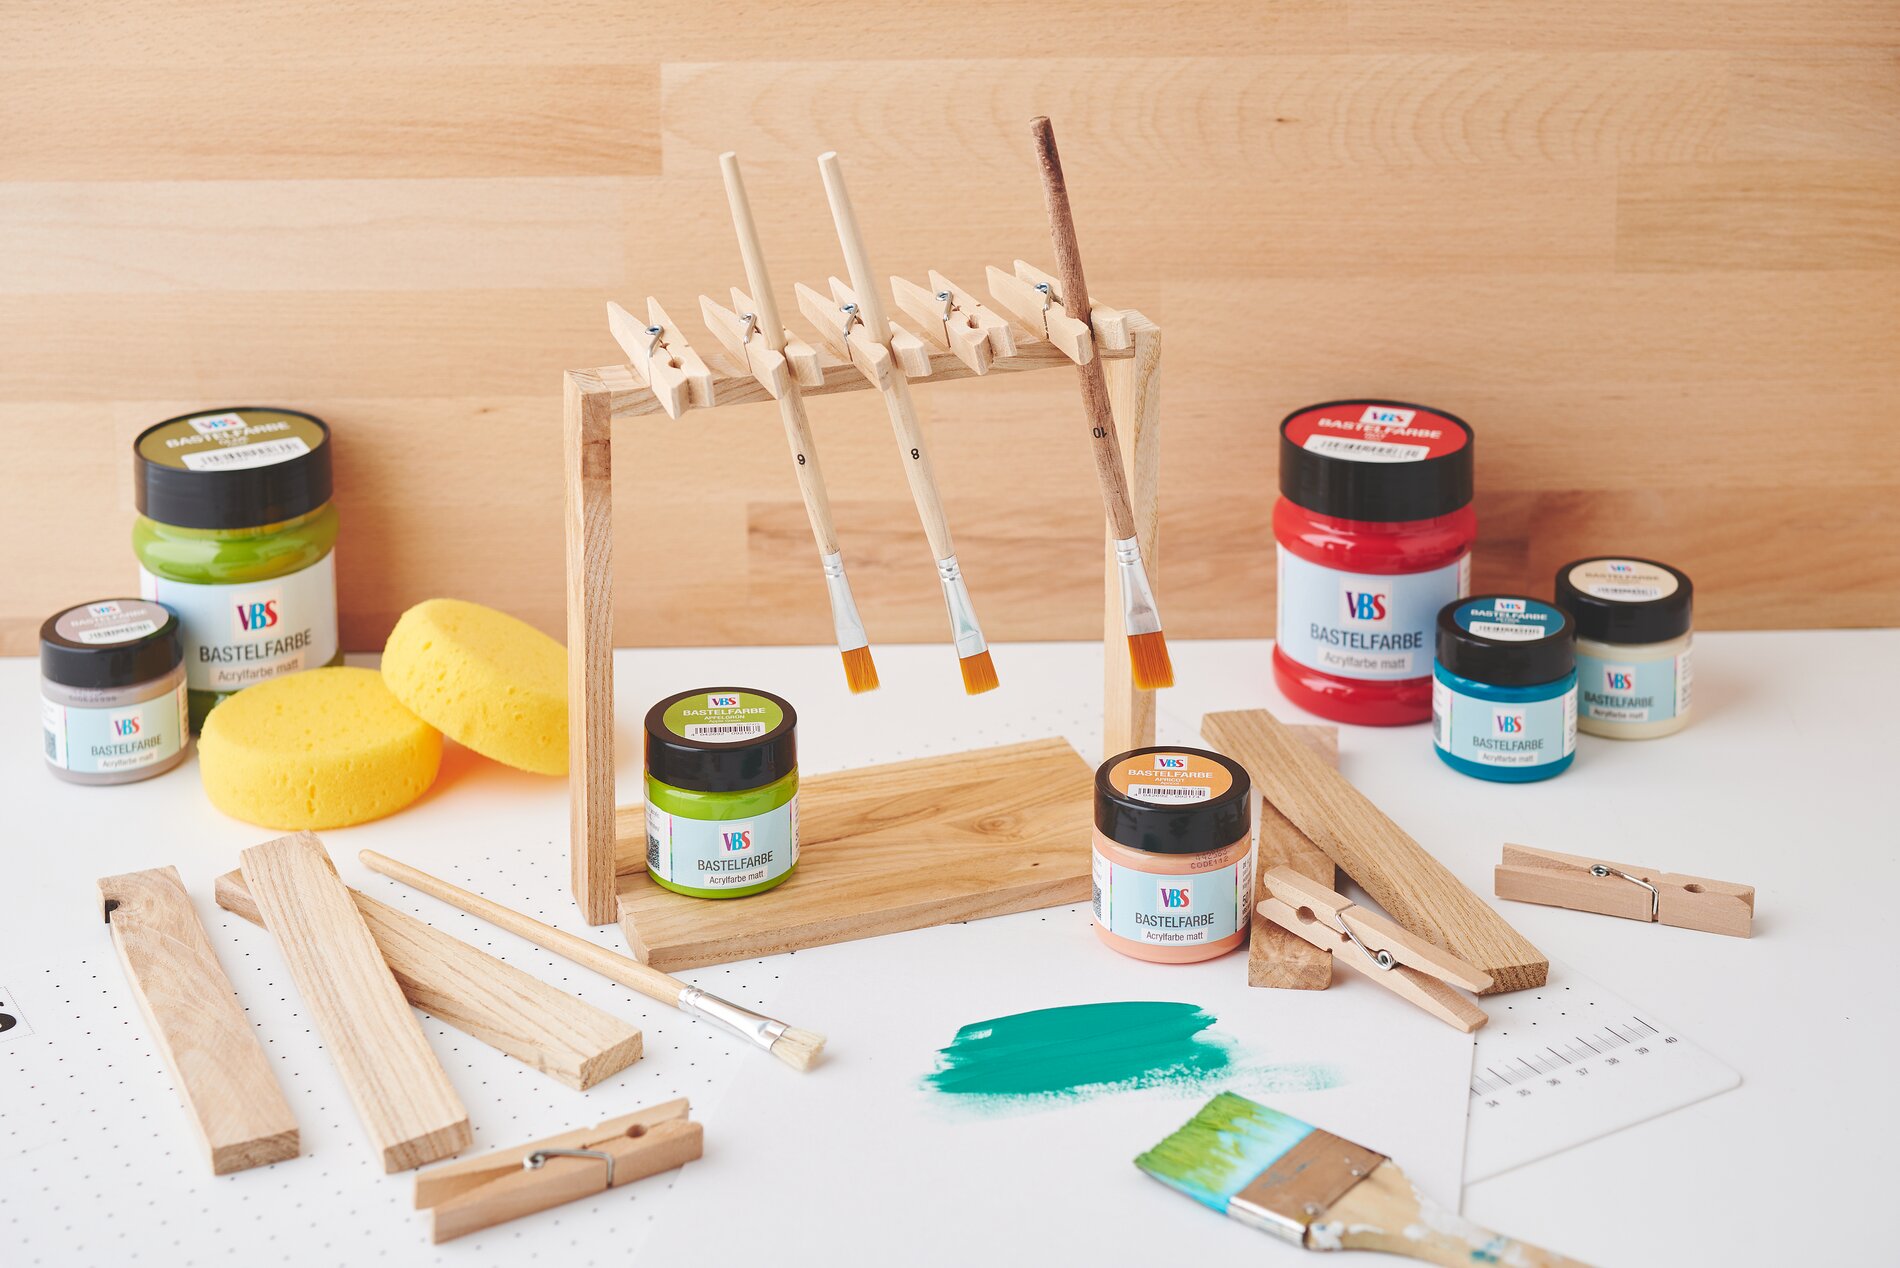
To build the holder for your brushes, glue three more blocks together to form a U-shaped frame. Place two blocks vertically and a third across them to stabilize the structure. This part will become the actual brush holder that keeps your painting tools safe.
Attaching the wooden clamps
Now attach the wooden clamps to the top of the U-shaped frame. Make sure to apply glue to one side of the clamp only so that you can still open and close the clamps later. These clips help to hold the brushes securely in place so that they do not slip.
Assembling the holder and base plate
Once all the parts have dried, glue the holder to the finished base plate. Position the holder in the middle and allow everything to dry completely again.
Finishing with varnish
To give your homemade brush holder the finishing touches and protect it from dirt at the same time, apply VBS Acrylic varnish to the base plate and the two side blocks of the holder. This layer makes the brush holder wipeable and protects it from the challenges of everyday creativity.
you have now created a functional and decorative brush holder that is both practical and unique. If you still need the materials for your next creative project, visit our online store.