www.vbs-hobby.com
Schultüte "Möhre"
Anleitung No. 865 Anleitung No. 865

School bag for school enrolment "Rabbit & Carrot
Extra tip:
Have the appropriate Ribbon ribbon to tie the school bag ready (approx. 50.cm long)
Ready is the school bag "carrot and rabbit"!
Under the following links you will find more ideas for creative tinkering of school bags with handicraft instructions
School bag handicraft instructions: Rabbit & Carrot
- Twist the school bag together and fix it with tape or hot glue
- Lay the crepe tape double and stick it around the inside of the edge of the school bag
- From the template a Stencil finished one and Felt cut out the rabbit parts from the white
- Glue the long arm piece together at the ends, put it over the tip on the school bag and fix it
- Now glue the body, the head and the tail on top of each other
- With the Pearl Pen the eyes, paws, nose, whiskers and tail work out
- Allow to dry well
- Cut into the Felt ribbon prong and stick it around the outside of the school bag, and a small piece to the tuft of grass under the rabbit
- Keep a remainder for the bow to tie up the school bag
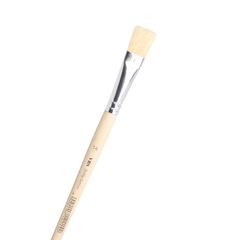
- Paint with black Hobby Color and a Bristle brushes small strip around the carrot
- Fill the school bag and pull it together with a large loop and work in the grass
- Cut the protruding end into strips with scissors and pluck them apart
Extra tip:
Have the appropriate Ribbon ribbon to tie the school bag ready (approx. 50.cm long)
Ready is the school bag "carrot and rabbit"!
Under the following links you will find more ideas for creative tinkering of school bags with handicraft instructions
- Tinkering with our idea for the "Crocodile" school bag
- Our creative handicraft instruction school bag "toadstool" tinker
- Our creative school bag "Freak" tinker
- Our storage schoolbag "Schoolbag ABC" tinker